Configuring NPS on Server 2012 with Cisco WLC: Part 2

In part 1 of this tutorial, I stepped through configuration of the Cisco Equipment and configuration of the Network Policy Server with Certificate.  In this tutorial, I’ll show you how to tie it all up in Group Policy.

This tutorial already assumes you have the following:
*Group Policy objects SPECIFICALLY for laptop computers
*CA certificate created

Group Policy can make your life easier especially if you have a large environment.  It’s important to have a good, CLEAN Active Directory free of clutter or orphaned objects (re: objects you don’t know about).  I suggest separating your computer accounts by PC and Laptop, laptops will get the wireless group policy while the PC’s won’t as they are typically hard lined into a RJ45 Jack.

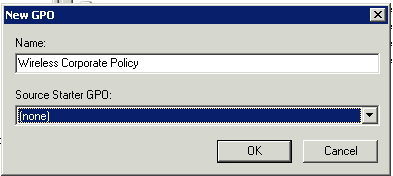
First, create a new GPO: give it a meaningful name
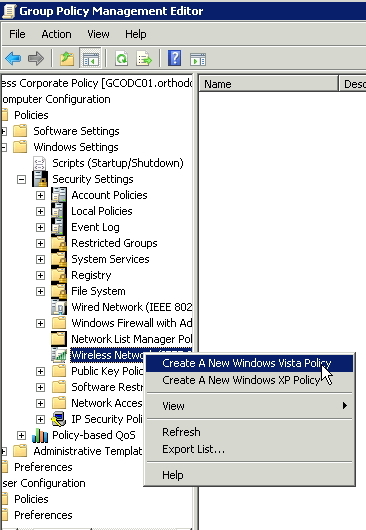
Once created, drill down into Computer Configuration->Windows Settings->Wireless Network (802.11) Policies and create a new Windows Vista (AKA Windows 7-8) Policy.  Tailor this to your needs, you can easily create a Windows XP Policy as the screens are very similar.
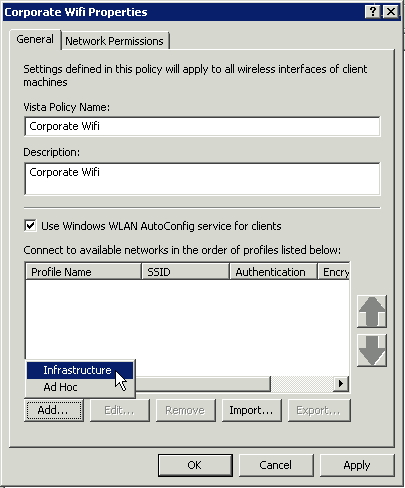
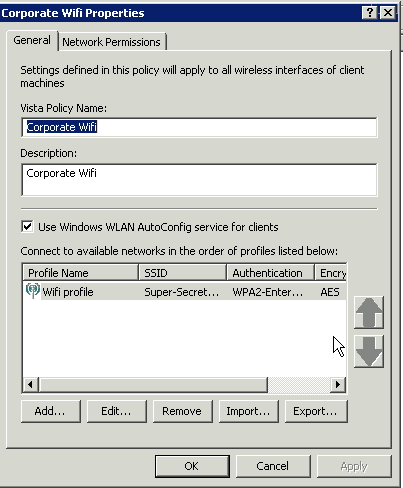
Create a Policy Name, I gave mine simply ‘Corporate Wifi’.  I also used the Windows WLAN configuration utility.  This means if you’re using the Dell connect utility or the HP connection manager this Group Policy will not work.  Again, depending on the laptops you’re configuring you’ll have to make adjustments.  This guide assumes you’re formatting laptops with standard Windows Operating Systems with no additional bloatware.

After giving it a policy name, add an Infrastructure network (on the bottom).
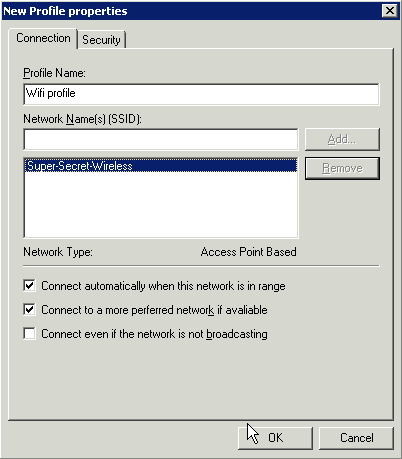
The Profile Name will be what shows the client is connected to – this means you have the opportunity to give your SSID another name to your internal employees.  For this example, I have an SSID of ‘Super-Secret-Wireless’, but the Profile name is simply ‘Wifi profile’.  When your users connect to wireless, they will only see they are connected to ‘Wifi profile’.
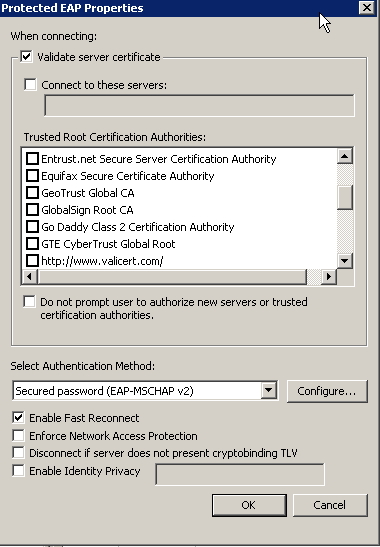
Click the Security Tab to change your SSID’s security settings.  I’m using WP2-Enterprise authentication with PEAP and a certificate.  To choose the certificate, click on Properties beside your authentication method.

Ensure you’re validating the Server Certificate, then put a checkmark on the certificate you created in the first part of this tutorial.  To ensure you clients have the certificate, you can use a GPO to install the certificate for you automatically.
Once you’ve added the profile, you’ll see it as one of the SSID’s in your associated Vista wireless policy
That’s about it.  As long as your client has the certificate, and you force a GPUPDATE they should be connected to your new wireless without your need to touch every laptop.
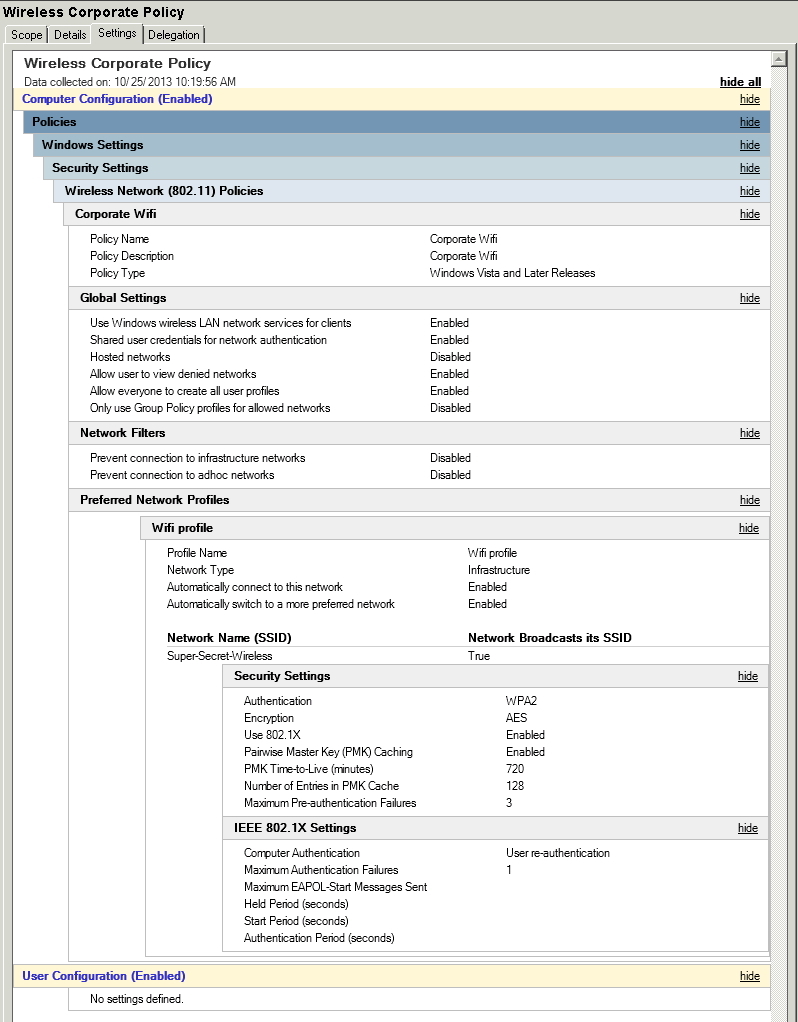
The last tutorial was done on Server 2012, these screen caps were done from a 2008 server.  Don’t worry, most of the content is still the same across both operating systems.

Configuring NPS on Server 2012 with Cisco WLC: Part 1

This How-to article is meant to configure Windows Server 2012 Network Policy Server, Certificate Authority with a Cisco WLC 2504 series (with Software version 7.4.100.0)

As specific as that list is, much of what Cisco offers with older IOS versions still holds true.  The authentication model still works, particularly the 802.1x configurations.  From the get go, you will have to create a new certificate if it’s not a Domain Controller.  This link explains in depth creation of a Certificate for use on a PEAP authentication model.  If you do have a domain controller, you can use the domain certificate for this purpose.

I recommend creation of a an RAS-IAS certificate and pushing the certificate via GPO, namely as you can change the expiration date of the certificate (like 10 years in the future if you really want).

First, configure the NPS:

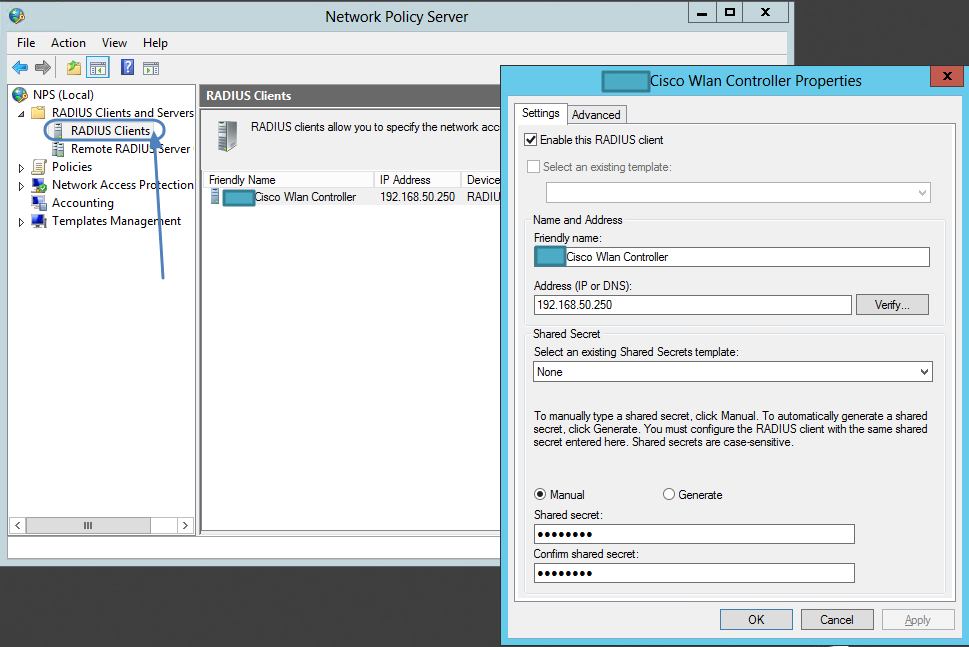
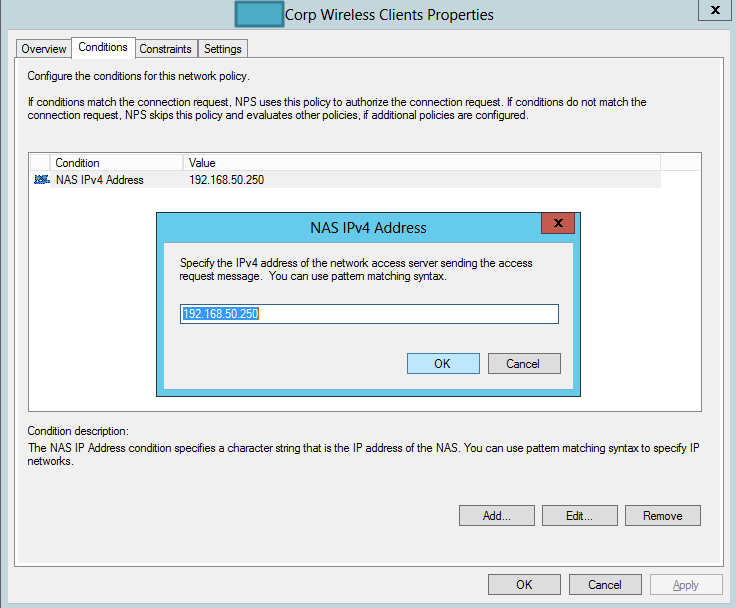
You’ll need the IP address of the WLAN controller (this example is 192.168.50.250) , configure the shared secret as you’ll need it for the Cisco WLAN.

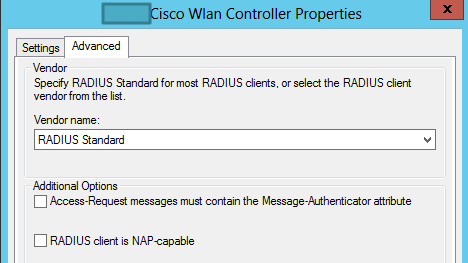
For the properties portion, use RADIUS Standard.  You can choose a specific Cisco device – but for this example and setup the RADIUS Standard works.

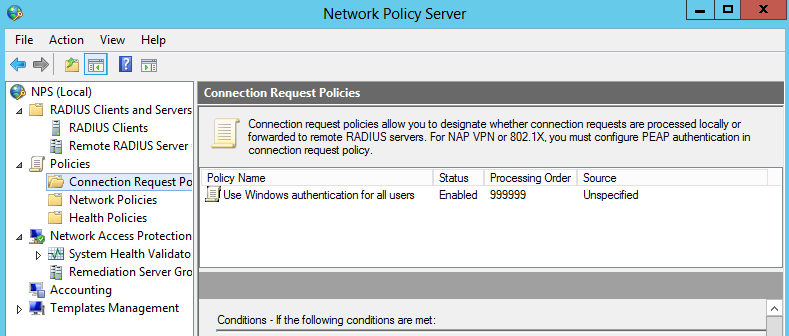
Next, click on Connection Request Policy, we’re going to create a new policy to use this server as the RADIUS authentication server

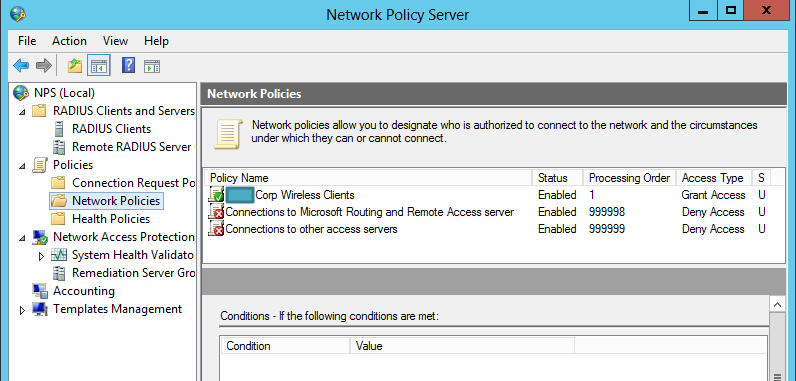
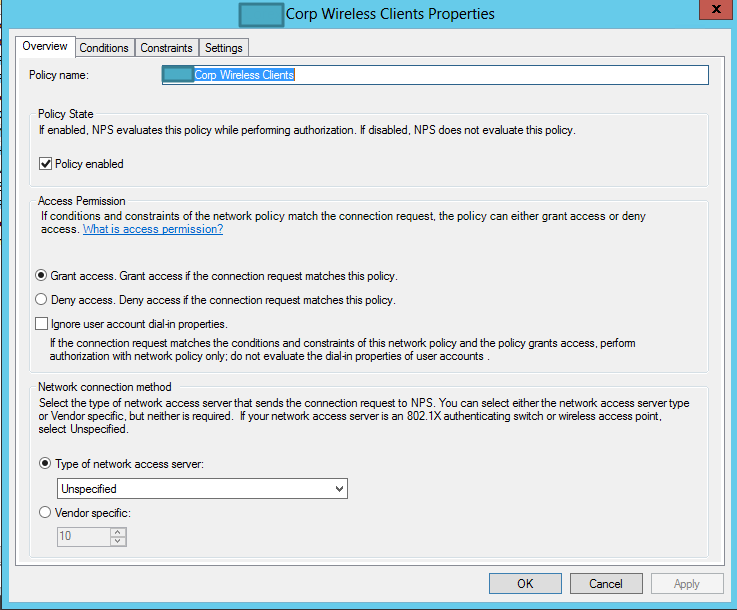
Give your Policy a meaningful name and make sure it’s enabled

For the Overview, make sure you check “Grant Access”, otherwise your clients will not connect.  You don’t have to specify the network access server for this example.

Under Conditions, enter the IP of the Cisco WLC as an NAS IPv4 Address type.  When IPv6 becomes available, you’ll see how this will change.

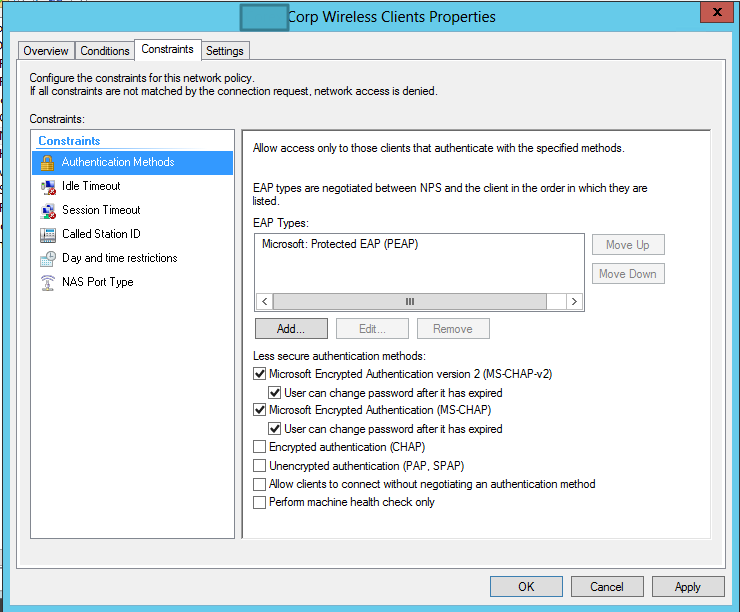
For Constraints, choose Authentication Methods, and add in Microsoft: Protected EAP (PEAP).  Make sure it has the same checkmarks as the ones below:

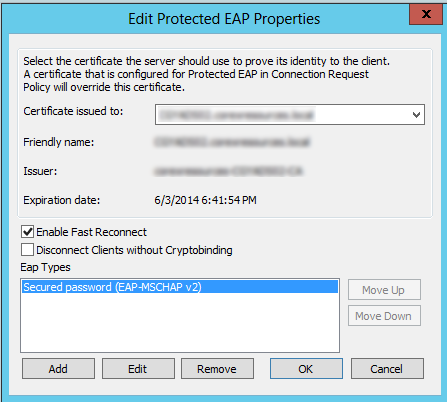
Highlight and click Edit… on the PEAP properties.  Here is where you want to ensure you have the proper Certificate.  Earlier in this tutorial, I mentioned using an RAS-IAS certificate over a domain issued certficate as the expiry date can be lengthened by a wider margin.  In your dropdowns, you should see this one, and your domain certificate (if this is a domain server).  If you’re having trouble deciding which certificate is which, Run the Windows Certification Authority and look at your issued certificates, the Certification path shows the name.  Use the appropriate one you want.  You should have only 1 option for EAP type: MSCHAP-V2.

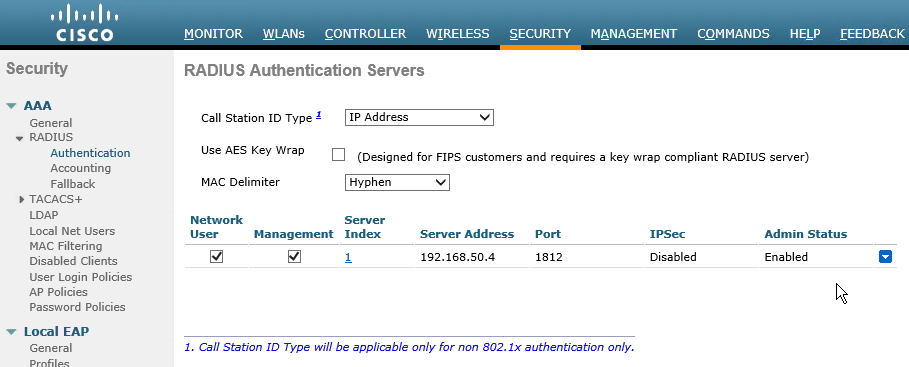
Next, log into your Wireless Lan Controller to do additional configuration.  For this example, I’ve already created by Wireless network and given it an SSID (longer steps are involved for that of course).  From the WLC main page, navigate to the Security Tab, and along the left hand side choose RADIUS->Authentication.  Add a new Server Address, here I’ve plugged in the IP of my Windows NPS.  Keep the default port 1812.

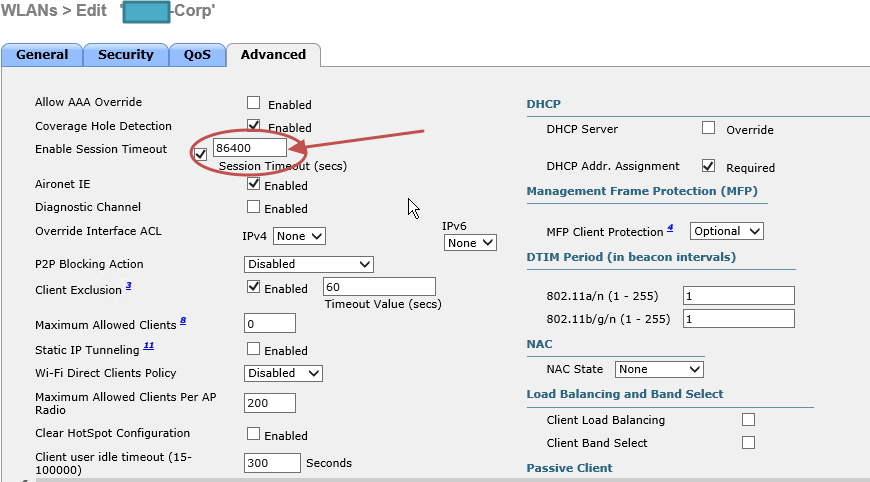
For my Cisco IOS version, I had to change my Session Time out value to 24 hours (86400 Seconds) as it was dropping every few minutes.  Older Cisco IOS versions don’t have this issue- could be something to do with Server 2012 polling.  Your mileage may vary.

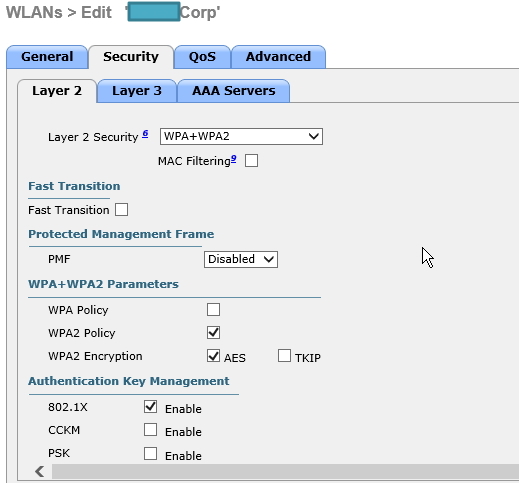
After adding in the IP of your NPS server, click on the SSID you want to use authentication, and choose the ‘Security’ Tab, in the sub tabs choose ‘Layer 2’, choose WPA+WPA2 for the type of security.

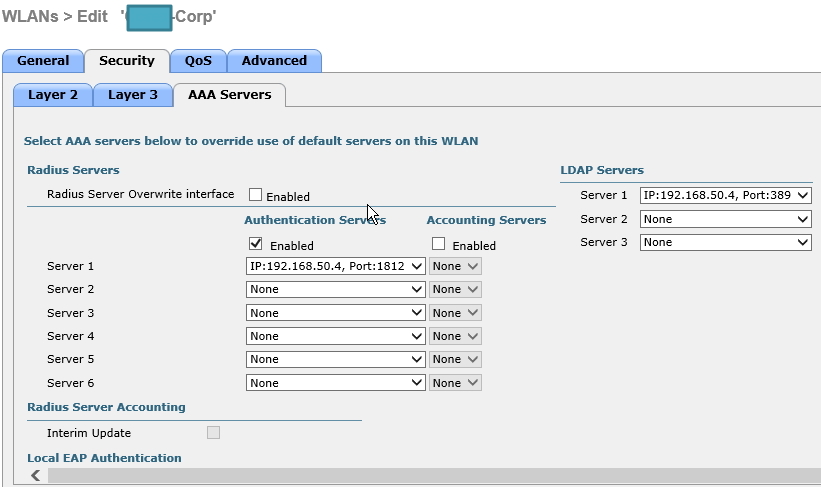
Next, choose ‘AAA Servers’.  For the first server, it should populate to the IP of our NPS server we did in a previous step.  The port will show up as 1812 (the default value) as well.  Make sure to use LDAP authentication to the same server, or the IP address of your domain controller if your NPS lives elsewhere.  Note the port changes for LDAP versus RADIUS NPS.

Save your changes and you should now have a functioning WPA wireless using RADIUS for authentication.  There are a few caveats here; you need to EXPORT the certificate used for authentication from the NPS server, and IMPORT into your Windows Laptop, then configure wireless to use said certificate and Windows domain.

Part 2 will cover adding the certificate and wireless network via Group Policy.