GPO enable VSS in Win 7

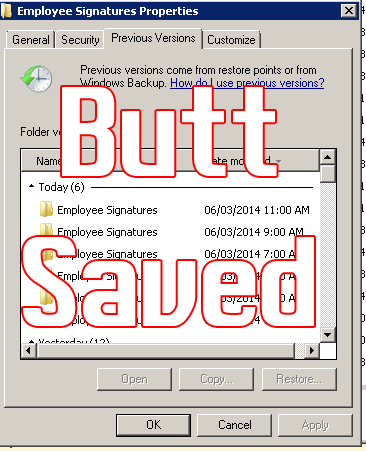
Volume Shadow copy has saved my butt on file, exchange, and SQL servers.  Typically, IT departments discourage previous versions on desktops mainly because it opens up issues with disk space and if it’s really worth saving or rescuing an MP3 or AVI.

Of course, if you have the space on your client machines to do it, you can enable VSS and grant users the chance to recover files right from their own desktop machines.

First, create a new GPO and give a give it an appropriate name.
1. Enable the Volume Shadow Copy Service (VSS):

Computer Configuration->Windows Settings->Security Settings->System Services->Volume Shadow Copy and set to Automatic.

2. Now give your users the ability to restore the files on their local PC’s:
User Configuration->Policies->Administrative Templates->Windows Components->Windows Explorer->Previous Versions->

Prevent restoring previous versions from backups  – disabled
Prevent restoring local previous versions – disabled

See the Previous Versions setting

GPO add corporate picture to your AD logon account

The default windows logon picture, while very stock is a bit boring. If you’re in the corporate environment where a more suitable logon picture is preferred, here are your steps to adding a default picture to all user’s profiles.

First, pick a picture and make your edits to make it EXACTLY 128 x 128 pixels (you can use the picture in this post as a guide). Make your edits accordingly and make sure to save it with a .BMP extension.

Create a new GPO, name it ‘Default Win7 logon picture’. Goto
User Configuration -> Preferences -> Windows Settings -> Files and create a new file

Set Action to Replace
For Source file, place your newly created .BMP in the GPO unique ID path: (you can find it by going to the details tab of the newly created group policy)

note your unique ID here

The resulting path in the source file should look like:
\\domain\SYSVOL\domain\Policies\{really-long-unique-gpo-identifier}\User\Preferences\Files\User.BMP

For Destination File, enter:
C:\ProgramData\Microsoft\User Account Pictures\user.bmp
(to change the local windows 7 .BMP picture)

It should look like the above, be sure to be wary of the direction of your slashes “\”

Lastly, apply the GPO to the proper User OU and make sure to do a Gpupdate /force.

*Alternatively, you can place your .BMP in a separate share on your network, ideally a DFS model will do as a general share requires full permissions.  The size of this particular .BMP was only 100KB, so Active Directory replication will be minimal.

Configuring NPS on Server 2012 with Cisco WLC: Part 2

In part 1 of this tutorial, I stepped through configuration of the Cisco Equipment and configuration of the Network Policy Server with Certificate.  In this tutorial, I’ll show you how to tie it all up in Group Policy.

This tutorial already assumes you have the following:
*Group Policy objects SPECIFICALLY for laptop computers
*CA certificate created

Group Policy can make your life easier especially if you have a large environment.  It’s important to have a good, CLEAN Active Directory free of clutter or orphaned objects (re: objects you don’t know about).  I suggest separating your computer accounts by PC and Laptop, laptops will get the wireless group policy while the PC’s won’t as they are typically hard lined into a RJ45 Jack.

First, create a new GPO: give it a meaningful name

Once created, drill down into Computer Configuration->Windows Settings->Wireless Network (802.11) Policies and create a new Windows Vista (AKA Windows 7-8) Policy.  Tailor this to your needs, you can easily create a Windows XP Policy as the screens are very similar.

Create a Policy Name, I gave mine simply ‘Corporate Wifi’.  I also used the Windows WLAN configuration utility.  This means if you’re using the Dell connect utility or the HP connection manager this Group Policy will not work.  Again, depending on the laptops you’re configuring you’ll have to make adjustments.  This guide assumes you’re formatting laptops with standard Windows Operating Systems with no additional bloatware.

After giving it a policy name, add an Infrastructure network (on the bottom).

The Profile Name will be what shows the client is connected to – this means you have the opportunity to give your SSID another name to your internal employees.  For this example, I have an SSID of ‘Super-Secret-Wireless’, but the Profile name is simply ‘Wifi profile’.  When your users connect to wireless, they will only see they are connected to ‘Wifi profile’.

Click the Security Tab to change your SSID’s security settings.  I’m using WP2-Enterprise authentication with PEAP and a certificate.  To choose the certificate, click on Properties beside your authentication method.

Ensure you’re validating the Server Certificate, then put a checkmark on the certificate you created in the first part of this tutorial.  To ensure you clients have the certificate, you can use a GPO to install the certificate for you automatically.

Once you’ve added the profile, you’ll see it as one of the SSID’s in your associated Vista wireless policy

That’s about it.  As long as your client has the certificate, and you force a GPUPDATE they should be connected to your new wireless without your need to touch every laptop.

The last tutorial was done on Server 2012, these screen caps were done from a 2008 server.  Don’t worry, most of the content is still the same across both operating systems.