

Already seen this part? Check out Part 1, Part 2, and Part3 In part 1, we covered the very basics. A one-line Get-ADUser query, a simple form with one button and output textbox. In this entry, we’ll add more functionality
Read More
Author: Dexter
Creating your first Powershell GUI – Part 1
Create your first Powershell GUI, Part 1: the Basics with simple tools and built in Windows 10 functionality
Ubuntu – Add Google 2FA for SSH
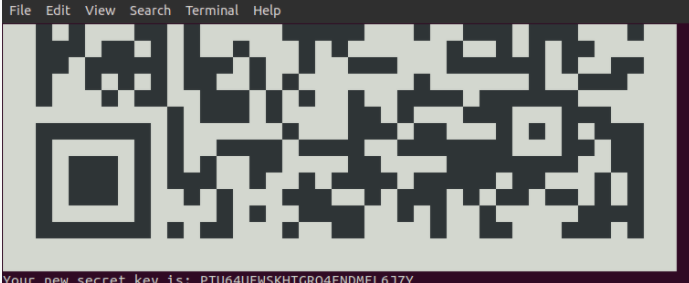
The Setup Host: Ubuntu 18.04 “Bionic Beaver” releaseSoftware: Google Chrome Original article found on linuxbabe Super handy, and secure way to ssh into your Linux Box at home. This uses the Android Google Authenticator for the QR code, generated right
Read More
Ubuntu Chrome Remote Desktop configuration
The Setup Host: Ubuntu 18.04 “Bionic Beaver” releaseSoftware: Google Chrome I thought this was weird: I couldn’t actually download the Chrome browser. Couldn’t do it from firefox (the Ubuntu default), or chromium (the open-source O.G Chrome package). I thought that
Read More
Oracle VirtualBox – Configure Guest-VM network to communicate with Host network

This is going to focus on configuring an Oracle Virtualbox VM to do a few things:-make it so the host, and local host network can see, ping, remote and use fileshares to the Oracle Box guest VM-Enable the Oracle box
Read More
GPO enable VSS in Win 7
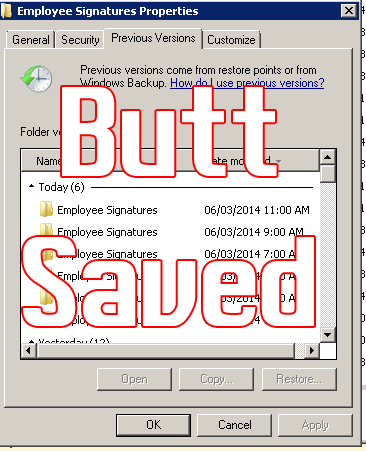
Volume Shadow copy has saved my butt on file, exchange, and SQL servers. Typically, IT departments discourage previous versions on desktops mainly because it opens up issues with disk space and if it’s really worth saving or rescuing an MP3
Read More
GPO add corporate picture to your AD logon account

Group Policy to set default Windows 7 Account pictures.
Disable .exe’s from running inside any user %appdata% directory – GPO

The Cryptolocker virus out there in the wild and I’ve seen it happen on a few computers and it’s certainly not pretty. The details are sorrid, but in a nutshell what happens is a crytolocker virus gets onto your computer,
Read More
Editing Office 2013 installs via Group Policy
With the new Office getting pushed out, I was running into problems with PST files, namely I didn’t want them in my environment cluttering things up and causing a ruckus on local computers. After a bit of research I found
Read More
How to get Green ticks on Google Drive back
I’ve been using Google Drive to sync files for some time now, because it’s great having 15GB of storage sitting in the cloud that I can access anytime. I’m not here to point out the merits of having a google account that needlessly
Read More